
Semantic Segmentation Annotation: Pixel-Level Data and Outsourcing

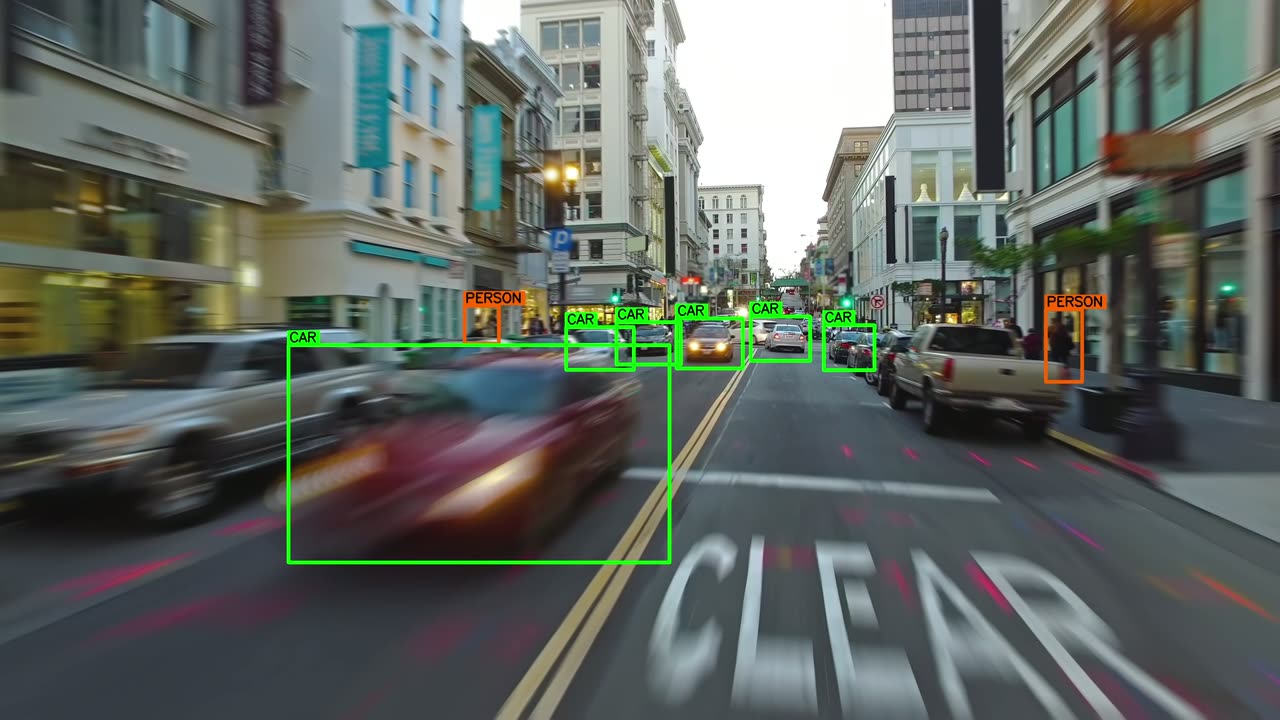
You got a bounding-box detector running, and the boxes are technically correct — but the edges are too loose for what you actually need. A tumor’s boundary in a medical scan. The exact drivable surface in front of a vehicle. A defect’s precise area on a production line. At that point, boxes stop being enough, and you’re looking at semantic segmentation: labeling data at the pixel level instead of the object level.
This guide covers when segmentation is actually necessary, a 5-step workflow for building a segmentation dataset, where teams typically get stuck doing it in-house, and how to start small with a PoC instead of committing to a full dataset upfront.
Table of contents
- When You Actually Need Segmentation
- Bounding Boxes vs. Segmentation
- Building a Segmentation Dataset: 5 Steps
- 1. Collect representative data
- 2. Define classes and a labeling spec
- 3. Annotate
- 4. Convert format and split the dataset
- 5. Train, evaluate, and go back to the data
- Where In-House Teams Get Stuck
- Start Small: The Case for a PoC
- In-House vs. Outsourcing
- Working with a Japan-Based Annotation Partner
- Frequently asked questions
When You Actually Need Segmentation
Segmentation matters when the shape of an object — not just its location — determines whether your model is useful. Three cases come up repeatedly:
- Medical imaging: precisely delineating a tumor, organ, or lesion boundary
- Autonomous driving / ADAS: pixel-level drivable-area, lane, and pedestrian boundaries
- Manufacturing visual inspection: measuring the exact shape and area of a defect
If your use case only needs to know whether and roughly where an object is present — inventory counts, simple detection alerts — bounding boxes are usually sufficient and considerably cheaper to produce. Getting this distinction right up front avoids paying for precision you don’t need.
For point-level segmentation of LiDAR data rather than images, see 3D point cloud annotation.
Bounding Boxes vs. Segmentation
| Aspect | Bounding Box | Segmentation |
|---|---|---|
| Label shape | Rectangle (4 points) | Polygon or pixel-level mask |
| Information captured | Approximate location and size | Exact boundary, area, and shape |
| Typical labeling time | Fast | Often several times longer per image |
| Indicative pricing (our rates) | from $0.036 / label | from $0.152 / region |
| Best fit | Detection, counting, simple tracking | Medical diagnostics, autonomous driving, defect inspection |
The higher per-unit cost of segmentation reflects the labor of tracing a precise boundary rather than dropping four points. It’s easy to over-specify — requesting pixel-perfect masks for a task that only needed coarse localization — so it’s worth confirming the precision requirement before committing to a labeling spec.
Building a Segmentation Dataset: 5 Steps
1. Collect representative data
Start by gathering images or video that reflect the conditions your model will actually see in production. Medical images vary by device and facility; driving scenes vary by weather, time of day, and region. Most downstream accuracy problems trace back to insufficient diversity at this stage, not to the model architecture.
2. Define classes and a labeling spec
Next, define exactly what gets labeled and how. This is where class-boundary ambiguity causes the most trouble: should “pedestrian” and “cyclist” be separate classes? How should overlapping or adjacent objects be handled — allowed to overlap slightly, or forced to have a gap? Writing these rules down before annotation begins prevents a costly full re-label later. Annotation guidelines here function the same way a style guide functions for text — without one, inter-annotator agreement drops fast.
3. Annotate
With the spec in place, annotators trace boundaries using polygon or brush tools. Many teams now use semi-automatic tools like Segment Anything (SAM) to generate a rough mask that a human then corrects — this speeds up throughput, but raw model output shouldn’t be accepted as-is. Boundary precision from automated pre-labeling varies enough that a review step is non-negotiable if consistency matters.
4. Convert format and split the dataset
Once labeling is done, convert annotations into the format your training pipeline expects — commonly COCO-style polygon coordinates or PNG mask files — and split the data into train, validation, and test sets.
5. Train, evaluate, and go back to the data
Train the model and evaluate using metrics like IoU (Intersection over Union). When accuracy falls short, the fix isn’t always architectural — check which classes had the most boundary ambiguity or which scenarios were underrepresented in the training set. In a data-centric AI workflow, the dataset is usually where the fastest gains are found.
Where In-House Teams Get Stuck
Three problems show up consistently in teams building segmentation datasets internally:
- Boundary drift: different annotators trace edges differently, and consistency degrades as more people are involved — a direct inter-annotator agreement problem
- Underestimated QA time: review and correction usually take longer than the initial labeling pass, and teams rarely budget for it upfront
- Engineering time diverted: hours meant for model development get absorbed by labeling logistics and spec revisions instead
None of this means segmentation should always be outsourced — but any in-house plan should account for these costs explicitly rather than discovering them mid-project.
Pixie Dust Technologies ran into exactly this. Color-coding rebar by type for their construction-site inspection AI is segmentation work, and doing it in-house alongside algorithm development was estimated at four months. A six-person annotation team completed it in two, returning roughly two months of engineer time to the development work.
Data for construction-site AI delivered at scale, fastCase study: Pixie Dust Technologies' rebar-inspection DX "TOTTARROW" recognition AI. A dedicated 6-person ANOSUPO team delivered high-quality, color-coded rebar annotation in two months — saving about two months of in-house engineer time and freeing the team for core algorithm work.annotation-support.com
Start Small: The Case for a PoC
Estimating “how many regions we’ll need” precisely, before you’ve labeled anything, is close to guesswork. A more practical approach: run a PoC on 50–100 images first, confirm both model behavior and the soundness of your labeling spec, and only then scale to a full dataset. If your raw data also needs cleanup or preprocessing before labeling can start, it’s worth scoping that alongside the PoC — see data collection and preprocessing for what that typically involves.
Data Collection & PreprocessingData collection & preprocessing outsourcing — collection/capture, cleansing, anonymization & annotation preprocessing. We collect hard-to-source data from scratch. 99.7% quality, $0 setup, fully usage-based.annotation-support.com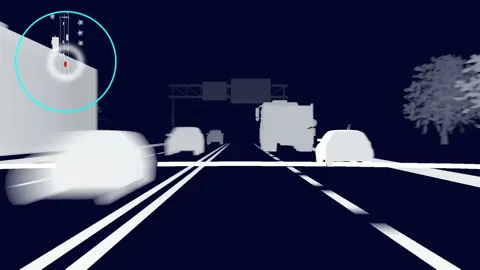
In-House vs. Outsourcing
| Factor | In-house tends to fit | Outsourcing tends to fit |
|---|---|---|
| Data volume | Small, one-off | Ongoing, large-scale |
| Spec sensitivity | Extremely confidential | Manageable with NDAs and per-project team isolation |
| Engineering bandwidth | Available | Needed for model development instead |
| Label consistency | Requires its own QA process | Built on full-volume inspection by default |
Segmentation is one of the more expensive annotation types, so it’s often the first task teams outsource. See our data annotation outsourcing guide for what drives unit price and how to compare vendors.
Working with a Japan-Based Annotation Partner
ANOSUPO, operated by Borderless Japan, provides segmentation annotation as part of its image and video annotation service. Instead of sampling-based spot checks, every deliverable goes through full-volume inspection, with a measured label consistency of 99.7%. Pricing is fully usage-based — no setup fee, no account management fee, and no minimum order — with segmentation PoCs typically starting around 50–100 images. Any defects traced to our process are corrected free of charge for one year after delivery. Rate details are on the pricing page.
PricingTransparent annotation pricing — Bbox from $0.036/label, keypoints from $0.021/point, segmentation from $0.152/region, 3D cuboids from $0.121, LLM evaluation from $0.121. $0 setup, fully usage-based, no minimum order.annotation-support.com
On the security side, the company holds ISO/IEC 27001 (ISMS) certification, doesn’t retain or process data locally (cloud-only), has NDAs with all staff, isolates teams per project, and physically deletes data once a project is complete — none of it is used to train the company’s own models.
For teams working primarily with bounding boxes rather than segmentation, our companion guide on building YOLO training data covers the box-annotation workflow in the same level of detail.
How to Create Training Data for YOLO: Annotation Workflow and Starting Small with a PoCA five-step workflow for YOLO training data: class design, annotation, label format, and sizing your first PoC.annotation-support.com
Frequently asked questions
Should I use segmentation or bounding boxes?
If knowing an object’s approximate location is enough — detection, counting, simple alerts — bounding boxes are usually sufficient and cheaper. If the shape or area of the object itself matters — medical diagnostics, drivable-area detection — segmentation is necessary.
Is there a minimum order for segmentation annotation?
No. PoCs typically start at around 50–100 images.
Can I test the service before committing?
Yes. A small sample of your own data (roughly 10–50 items) is annotated under the actual production workflow so you can evaluate quality before placing a full order.
If I use SAM or another auto-labeling tool, do I still need review?
Auto-labeling tools speed up the rough draft, but boundary precision from automated output varies enough that a review step matters for consistency. Without full-volume inspection, quality drift can go unnoticed until it shows up in model performance.
How is our data handled?
Under ISO/IEC 27001 (ISMS) certification, with cloud-only processing (no local storage), NDAs across all staff, per-project team isolation, and physical deletion of data after project completion. Data is never used to train our own models.

Summary
Segmentation earns its cost when shape — not just location — determines whether a model is useful. The workflow itself isn’t exotic: representative data, a clear labeling spec, careful annotation, format conversion, and a feedback loop back from evaluation to the dataset. Where teams typically lose time is boundary consistency and QA, in-house or out. Starting with a small PoC, rather than committing to a full dataset upfront, is usually the fastest way to find out which approach fits.
Try our quality on your own data — for free.